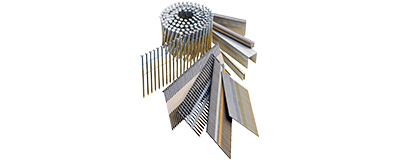
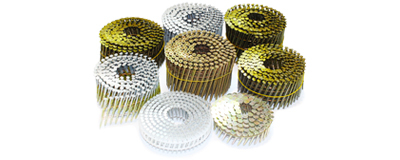
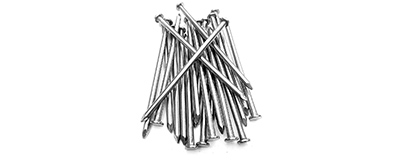


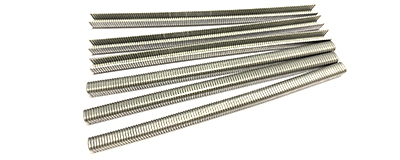
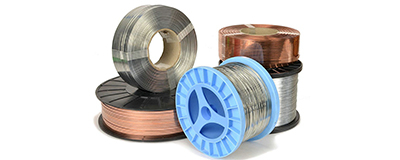
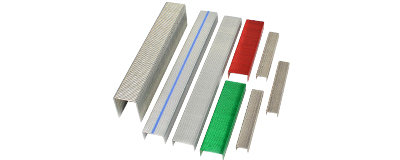


An excellent hardwood flooring installation starts with the right fasteners. You will find that most standard 3/4-inch solid hardwood flooring requires 16-gauge or 18-gauge cleat nails. These cleat nails provide superior holding power. For thinner engineered or solid wood under 5/8-inch, manufacturers often recommend 18-gauge or 20-gauge staples. Choosing the correct nails ensures a secure and long-lasting floor.
Cleat Nails vs. Staples for Hardwood Flooring Installation
Choosing between cleat nails and staples is a key decision in your hardwood flooring installation. Each fastener has specific uses, and picking the right one protects your investment.
Why Cleats Are the Professional's Choice
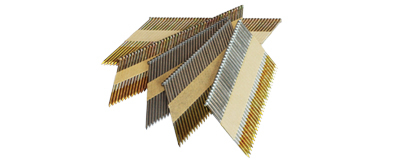
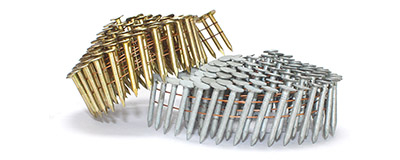
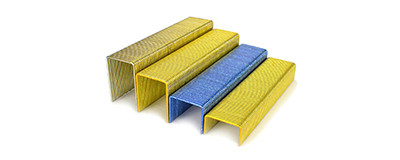
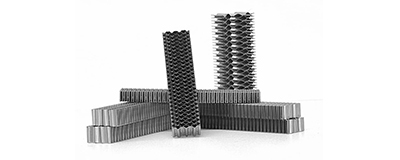
Professionals often prefer cleat nails for installing traditional 3/4-inch solid hardwood. Their unique design offers several key advantages that ensure a floor lasts for decades. The L-shape of cleat nails gives them incredible holding power while still allowing the floor to breathe.
Allows Natural Movement: Wood expands and contracts with changes in humidity. Cleat nails secure the boards firmly but permit this slight, natural movement. This reduces the risk of boards cracking or buckling over time.
Superior Holding Power: The design of these nails provides a stronger long-term grip in the subfloor compared to staples.
Reduces Damage: Using the correct gauge of cleat nails is less likely to split the tongue of dense or exotic hardwoods.
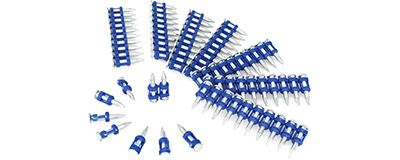
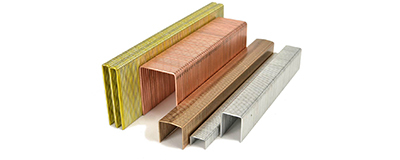
When to Use Staples Instead
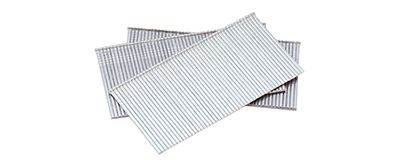
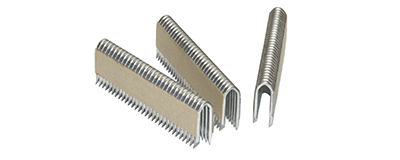
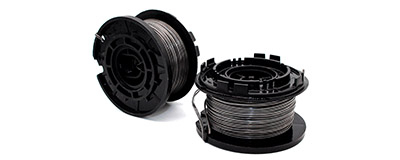
While cleat nails are often the top choice, staples have their place, especially with modern flooring materials. You might prefer staples when working with thinner engineered flooring. Their wider crown provides a good hold on these advanced materials. Staples are also affordable and widely available, making them a practical option.
However, you must consider the wood species and environment. Staples secure flooring very tightly, which can be a problem in certain conditions. They may cause splits or cracks when used with very hard wood species.
Pro Tip: In areas with high humidity or wide temperature swings, the tight grip of staples can be a disadvantage. As the wood tries to expand, this tight hold can cause the flooring to squeak, split, or even push the staples back out over time. Always check the flooring manufacturer's recommendation for the proper nails or staples.
Selecting the Right Gauge for Your Nails
Choosing the right nail gauge is crucial for a successful installation. The gauge refers to the thickness of the fastener. A lower gauge number means a thicker nail. The correct gauge secures your floor properly without causing damage.
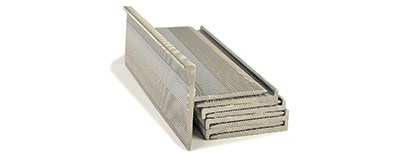
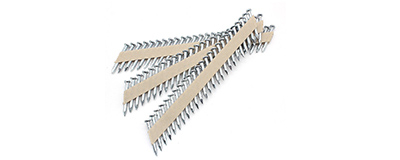
16-Gauge: The Industry Standard
You will use 16-gauge cleat nails for most standard 3/4-inch solid hardwood floors. This gauge is the professional's go-to choice for a reason. These fasteners fall into the heavy-wire category, giving them superior tensile strength and holding power. This thickness is perfect for securing heavy, solid planks to your subfloor, ensuring a tight and long-lasting fit. The robust nature of 16-gauge cleat nails makes them the workhorse for traditional hardwood projects.
18-Gauge: For Thinner or Exotic Woods
You should switch to 18-gauge cleat nails when working with more delicate materials. A fastener that is too large for the wood can cause significant problems. For example, some hard, brittle woods like Australian Cypress can easily split when you use a thick 16-gauge fastener. An 18-gauge nail is thinner, which solves this issue.
Consider using 18-gauge cleat nails in these situations:
Hard or Brittle Woods: The slimmer profile reduces the risk of splitting the tongue on dense exotic species.
Thinner Solid Wood: It provides a secure hold for flooring under 3/4-inch thick without overpowering the plank.
Engineered Flooring: Many manufacturers recommend 18-gauge fasteners for their products.
The smaller diameter of these nails also creates a smaller, less noticeable hole. This gives your installation a cleaner finish.
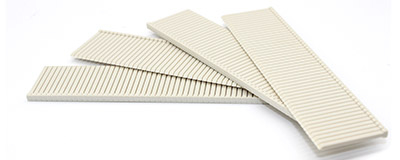
20-Gauge: For Ultra-Thin Flooring
You will need 20-gauge fasteners for the most delicate flooring options. These are considered fine-wire fasteners. They are designed for precision on very thin or fragile materials, often under 3/8-inch thick. While they have less holding power than thicker nails, their main benefit is preventing damage. Using a larger gauge on these floors would likely cause splits, cracks, and other installation headaches.
Important Note: Always consult your flooring manufacturer's installation guide when working with thin or engineered products. They will specify the exact gauge and type of fastener required to maintain your warranty and ensure a proper installation.
Our Recommendations for Fastener Length
After you select the right gauge, you must choose the correct fastener length. The length of your nail or staple is just as important as its thickness. Using a fastener that is too short will not secure the floor properly. A fastener that is too long can cause problems with your subfloor. These recommendations will help you make the right choice.
The General Rule for Nail Length
You can follow a simple rule for most installations. Your fastener must penetrate completely through the hardwood plank and go deep into the wood subfloor. For a strong hold, you want the nail to go at least 5/8-inch into the subfloor material, such as plywood or OSB. This ensures the fastener has enough material to grip, creating a solid connection between your new floor and the structure of your home.
Fastener Length for 3/4" Flooring
You will find some debate among professionals regarding the ideal fastener length for standard 3/4-inch flooring. For many years, the 2-inch fastener has been the go-to choice. Many installers stand by this length for its proven performance.
Many pros agree with this standard. As installer Nick states, the rule is simple: "2" for 3/4 " solid." Another expert, Gary, adds that this is correct for "3/4" flooring over 3/4" plywood UNLESS the plywood is over concrete."
However, other experts argue that modern subfloors have changed the requirements. They suggest that a shorter fastener is now more appropriate. This prevents the fastener from punching all the way through the subfloor, which can weaken its grip.
An alternative view, shared by a user named Floorguy, comes from a wood science instructor. He argues that "the 2" fasteners were for 33/32 flooring of old, over a dimensional lumber subfloor. 1½" are for ¾ over ¾, so the fasteners don't blow through the subfloor, and losing ½ of their holding power when they do blow through."
Your choice between 1-1/2 inch and 2-inch nails depends on your subfloor's thickness. These recommendations and factors to consider will guide you to the best decision for your project's specific needs.
Fastener Length for 1/2" to 5/8" Flooring
You must use shorter fasteners when installing thinner solid or engineered flooring. A 1-1/2 inch fastener is the most common length for flooring that is between 1/2-inch and 5/8-inch thick. This length provides excellent holding power without the risk of going through a standard 3/4-inch subfloor.
Manufacturer recommendations can vary, so you should always check their guides. Here are some examples of fastener types used for 1/2-inch flooring:
One major manufacturer, Mullican, recommends a 1-1/2 inch staple for its 1/2-inch engineered product.
Another brand, Kahrs, has suggested using 1-1/2 inch staples from a Bostitch nailer for its similar flooring.
Some installers use 18-gauge, 1-1/2 inch E-cleats from brands like Powernail or Primatech for a high-quality finish.
In some cases, users have successfully installed 1/2-inch floors with shorter 1-inch staples, but this is less common.
Always put the manufacturer's recommendations first. Using the specified nails or staples is often required to keep your flooring warranty valid.
How to Install Hardwood Flooring Over Different Subfloors

Your subfloor is the foundation of your new hardwood floor. The type of subfloor you have determines the correct installation method. You must prepare your subfloor properly to ensure a beautiful and long-lasting result.
Nailing into Plywood or OSB
Plywood and Oriented Strand Board (OSB) are the most common subfloors for a nail-down hardwood flooring installation. Before you begin, you must make sure your subfloor is ready. The National Wood Flooring Association (NWFA) provides clear guidelines for this.
Sound: Your subfloor should not have any movement, squeaks, or damage.
Flat: The surface must be flat, typically within 3/16” over a 6-foot area.
Dry: You should check that the subfloor's moisture content is at an acceptable level, usually not exceeding 13%.
The thickness of your subfloor is also critical and depends on the spacing of your floor joists.
Meeting these standards ensures your subfloor can properly support the new flooring.
Fastening Over Concrete Subfloors
You cannot nail hardwood directly into a concrete slab. The proper installation of wood flooring over concrete requires creating a suitable surface first. This process always starts with testing the concrete for moisture. A dry and flat slab is essential.
Critical Step: Concrete moisture is a floor's worst enemy. You must perform a moisture test using a method like the ASTM F2170 relative humidity test. If the concrete is too wet, you must wait for it to dry or use a specialized moisture barrier.
Once the slab is prepared, you have a few options to install hardwood flooring:
Build a Wood Subfloor: You can fasten a layer of 3/4-inch plywood over the concrete. This creates a new surface that you can nail into, just like a standard wood subfloor.
Use a Sleeper System: This method involves attaching wooden boards (sleepers) to the concrete. You then nail the hardwood planks to the sleepers.
Glue Down the Floor: You can glue engineered or some solid wood floors directly to the concrete. This requires a very flat slab and a special adhesive that also acts as a moisture barrier.
Special Nail Considerations for Wood Species
The type of wood you choose greatly affects your installation technique. Different species have unique densities and properties. You must adjust your tools and fasteners to match the wood for a successful and lasting installation.
Fastening Harder Woods like Hickory or Brazilian Cherry
You will need more power when working with extremely hard and dense woods. These species are known for their exceptional durability. The Janka hardness scale measures a wood's resistance to denting. For perspective:
Hickory has a Janka rating of 1820.
Brazilian Cherry (Jatoba) is even harder, with a rating of 2350.
This density means your standard nailer settings might not be enough. You may need to increase your compressor's air pressure to around 125-140 PSI to drive the nails correctly. Without enough pressure, fasteners can fail to set properly. Using a thinner 18-gauge cleat instead of a 16-gauge can also help prevent the wood's tongue from splitting.
Pro Tip: Always test your nailer on a scrap piece of the hardwood first. Adjust the air pressure until the fastener sits perfectly in the nail pocket without damaging the board.
Nailing Softer Woods like Pine or Fir
You face a different set of challenges with softer woods like pine and fir. These woods are much less dense, so a fastener driven with too much force can cause damage. Driving nails too fast or with excessive pressure can split the tongue or sink the fastener too deep, which reduces its holding power.
This can compromise the long-term durability of your floor. You should reduce your nailer's air pressure significantly compared to what you would use for oak or hickory. The goal is to apply just enough force to seat the fastener correctly without overpowering the soft wood. These recommendations and factors to consider will help you avoid common mistakes and ensure a secure installation, regardless of the wood species.
Common Nailing Mistakes to Avoid

When you install hardwood flooring, avoiding simple errors is key to a professional result. Paying attention to a few details will ensure your floor is secure, beautiful, and lasts for years.
Using the Wrong Air Pressure
You must set the correct air pressure on your pneumatic nailer. Using the wrong pressure is a common mistake that can ruin your flooring. The typical range for a nailer is 70-100 PSI, but this is just a starting point.
Too much pressure can crack the tongue of the board or drive the fastener too deep.
Too little pressure will leave the nails sticking up, preventing the next board from fitting correctly.
Pro Tip: Always test your nailer on a scrap piece of flooring before you begin. Denser woods like Brazilian Cherry need more pressure than softer woods. Adjust the pressure until the fastener sits perfectly in the nail pocket without causing any damage.
Incorrect Fastener Spacing
Proper spacing for your fasteners is critical. Incorrect spacing can lead to a loose floor that makes noise over time. You should follow industry guidelines to secure each plank properly. As a general rule, you should place fasteners every 6 to 8 inches along the length of the board. Also, keep all nails 1 to 2 inches away from the ends of each plank to prevent splitting.
For wider planks, you will need to place your nails closer together. This helps to minimize squeaks and movement. You can use this chart as a helpful guide:
Board Width | Recommended Spacing |
|---|---|
Up to 4" | 6-8 inches |
4" to 7" | 6 inches |
Damaging the Tongue or Board Edge
You must be careful when positioning your flooring nailer. If you are not careful, you can easily damage the tongue of the board. A damaged tongue makes it difficult to fit the next board tightly. This can create gaps in your finished floor. Always make sure the nailer's foot is seated firmly and correctly on the board before firing. This ensures the nail enters the nail pocket at the proper 45-degree angle, securing the board without damaging the delicate tongue.
Follow these final recommendations for your hardwood flooring installation. These recommendations will help you choose the correct fasteners.
For standard 3/4" floors, use 2-inch, 16-gauge cleat nails.
For thinner or very hard woods, select 1-1/2-inch, 18-gauge cleat nails to prevent splitting.
Professionals prefer cleat nails over other nails for their superior holding power. Using the right cleat nails ensures a secure floor.
Final Tip: Always test your nailer on a scrap piece of flooring. This ensures your nails set at the perfect depth without causing damage.
FAQ
Can I reuse old nails or staples?
You should always use new fasteners for your project. Old nails and staples lose their holding power and can bend or break. Using new fasteners is a small investment that ensures the long-term durability of your floor.
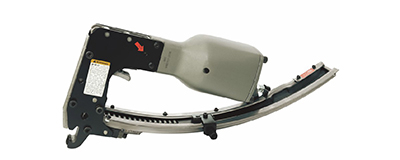
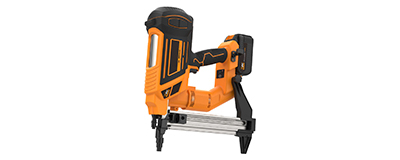
Do I need a special nail gun for hardwood floors?
Yes, you need a flooring nailer or stapler. These special tools drive fasteners at the perfect 45-degree angle into the board's tongue. This process secures the wood without damaging it, which is critical for a successful hardwood flooring installation.
When should I face-nail a board?
You face-nail boards where your flooring nailer cannot reach. This usually includes the first and last rows of your installation. You drive a finish nail straight down through the face of the board and cover the small hole with matching wood putty.
How do I start when I install hardwood flooring?
You begin by measuring and snapping a straight chalk line for your first row. You will then face-nail this row into place. This creates a secure and straight foundation for the rest of your floor.