


You experience wood splitting when a nail acts like a wedge. This action forces the wood fibers apart, which leads to splitting and ruins a clean finish.
The good news? The solution is simple. You can prevent wood splitting by reducing that wedging force. This involves preparing the wood and choosing the correct nail for the job.
Understanding the Causes of Wood Splitting

You can prevent wood splitting by first understanding its primary causes. The problem often begins with the nail itself or the condition of the wood. Let's explore the most common reasons for this frustrating issue.
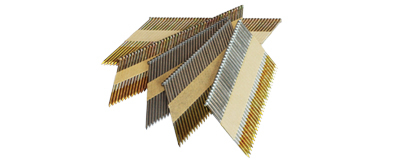
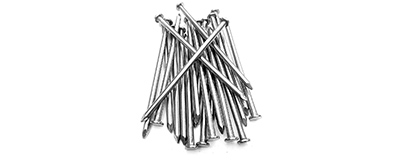
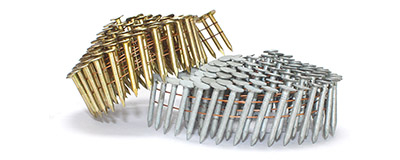
The Nail is Too Large
A nail works by creating a wedge effect that spreads wood fibers apart. A larger nail creates more pressure. This increased force can easily overwhelm the wood's strength, causing it to break. The nail's design also matters.
Smooth shank nails are often a better choice as they are less likely to cause splitting during installation.
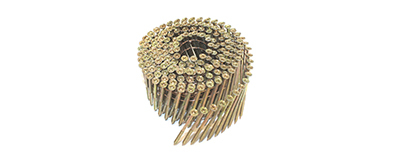
Ring shank nails, while providing great holding power, can increase the risk of timber splitting, especially in harder wood types.
Choosing a nail with the right diameter and shank for your project is a critical first step.
Nailing Too Close to the Edge
You must consider the wood grain when you drive a nail. The fibers run in a specific direction. Nailing near the end or edge of a board puts immense pressure on a small number of these fibers.
When a nail penetrates wood across its natural grain, it applies outward pressure. This pressure tears the weaker fibers along the grain, leading to splitting and creating cracks.
This is why you see splitting happen so often at the ends of boards. The wood simply has nowhere to go, so it breaks apart.
The Wood is Hard or Dry
The condition of your material plays a huge role. Hardwoods are denser and less flexible than softwoods. Dry wood has very little moisture, making it brittle and prone to cracking under pressure. Nailing into hard, dry wood or directly into knots can almost guarantee a split. Maintaining proper moisture is key.
Wood Type | Ideal Moisture Content |
|---|---|
Hardwoods | 6% to 9% |
Softwoods | 10% to 14% |
Wood with too little moisture loses its strength. This makes it unable to handle the wedging force of a nail, resulting in splitting.
Using the Wrong Nailing Technique
Your technique matters just as much as your tools. How you drive a nail into a board can be the difference between a clean finish and a frustrating crack. A heavy-handed or incorrect approach creates excessive force. This force overwhelms the wood fibers and causes damage.
Many woodworkers see the same mistake happen over and over. It is a common source of frustration for beginners and experts alike.
I’ve seen it a thousand times, a well intentioned person is installing a nail at the end of a board and POW the board splits!!! If using conventional nails, watch out at the ends of pieces of wood this is an area that tends to split easy.
This kind of wood splitting often results from a few common errors. You can avoid splitting by recognizing these simple mistakes. Many issues come from a lack of preparation or awareness of the material.
Nailing too close to the edge or end of the board.
Using nails with a diameter that is too large for the job.
Nailing through or very near knots in the lumber.
Not blunting the point of the nail before driving it.
Using very dry wood, which is less flexible and more prone to splitting.
To prevent this, you should use controlled, gentle taps to start the nail. Once it is set, you can use firmer, more confident strikes to drive it home. Always aim to hit the nail head squarely. A glancing blow can bend the nail, increasing the wedging force and causing the wood to split. Proper technique gives the wood fibers time to move aside instead of breaking.
The Ultimate Solution to Prevent Wood Splitting

You now understand the causes of wood splitting. The next step is to apply the right techniques to stop it from happening. These methods reduce the wedging force of the nail and give you a clean, professional finish every time.
Drill a Pilot Hole: The #1 Method
Drilling a pilot hole is the most reliable way to prevent wood splitting. This technique removes wood fibers before you drive the nail. This creates a clear path, so the nail slides in without forcing the fibers apart. This single step is the best solution for a guaranteed split-free result.
You should drill the pilot hole to a depth that is just shy of the nail's total length. This practice ensures the entire nail shank enters a pre-drilled channel, eliminating pressure on the surrounding wood. The diameter of the hole is also important and depends on the wood type.
You need pilot holes for dense materials like MDF and hardwoods such as oak to avoid cracking.
You generally do not need pilot holes for softwoods like pine, but they can still help near board ends.
For hardwoods, you can make the pilot hole up to 95% of the nail's shaft diameter.
For softwoods, the pilot hole should be about 90% of the nail's shaft diameter.
Pro Tip: Always choose a drill bit that is slightly smaller than the diameter of your nail. This allows the nail threads to grip the wood for maximum holding power without causing any splitting.
Blunt the Nail Tip
This method may seem backward, but it is highly effective. A sharp nail point acts like a wedge. It forces its way between wood fibers and pushes them apart until they break. A blunted nail tip changes this interaction completely.
You can easily blunt a nail tip by turning it upside down on a hard surface and striking it once or twice with your hammer. This simple action transforms the tip from a wedge into a punch. The blunted nail now tears or breaks the fibers directly in its path, creating a hole instead of causing a split. This technique is especially useful when you are hand-nailing near the end of a board.
Choose a Smaller Nail
The size of your nail has a direct impact on splitting. A large-diameter nail displaces more wood and creates more pressure. Choosing a smaller gauge (thinner) nail is a simple way to reduce this force. However, you must balance size with strength. A nail that is too short or thin may reduce the fastener's holding strength.
Your project's needs will determine the correct nail size. Using the right gauge is critical for both performance and appearance.
Nail Gauge | Common Uses & Characteristics |
|---|---|
Best for heavy trim like baseboards, crown molding, and door casings. They offer strong holding power but leave a more noticeable hole. | |
18-Gauge | A great all-around choice for lighter trim and molding. These brad nails offer good holding power with a smaller head, reducing the risk of splitting. |
Ideal for delicate and fine detail work. These pins leave nearly invisible holes, making them perfect for small trim pieces where splitting is a major concern. |
Always consult your project's requirements to select the right nail. A smaller nail is often the key to avoiding damage, especially in delicate materials.
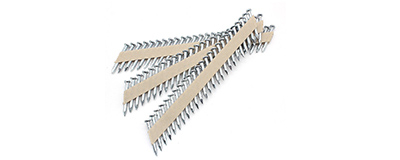
Use the Right Type of Nail (Finishing vs. Common)
You must select the right type of nail for your project. The design of a nail directly affects its tendency to split wood. The two most basic types you will encounter are common nails and finishing nails. Each serves a different purpose.
A common nail has a thick shank and a wide, flat head. This design provides maximum holding power, making it great for construction framing. However, its large diameter creates significant wedging force, which often causes splitting in finish work. A finishing nail is much thinner and has a very small head. You use it for attaching trim and molding where appearance is key. Its slender profile displaces less wood, drastically reducing the risk of splitting.
Remember: The goal of finish work is a clean look. A finishing nail is designed specifically for this, sinking just below the surface so you can cover the hole with wood filler.
This table breaks down the key differences:
Feature | Common Nail | Finishing Nail |
|---|---|---|
Shank Diameter | Thick | Thin |
Head | Wide and flat | Small and barrel-shaped |
Primary Use | Structural framing | Trim, molding, and cabinetry |
Splitting Risk | High | Low |
Choosing the correct nail type is a simple yet powerful step toward a split-free finish.
Lubricate the Nail Shank
You can make nailing easier and safer for the wood by lubricating the nail. A small amount of lubricant reduces the friction between the metal and the wood fibers. This allows the nail to slide into the wood more smoothly instead of forcing the fibers apart. This simple preparation can help prevent wood splitting, especially in dense hardwoods.
You do not need a special or expensive product. Simple household items work perfectly.
Finishing Wax: You can apply a high-quality finishing wax. Many natural waxes contain ingredients that are great for wood.
Tallow
Bees Wax
Lemon Essential Oil
Paraffin Wax: Paraffin wax is another excellent choice. You can simply rub the nail shank against a block of paraffin. For a more advanced application, you can gently heat the wax until it becomes liquid and dip the nail tips in it, letting a thin coat harden before use.
A thin coat is all you need. This small step provides a big advantage, ensuring the nail drives home with minimal resistance and damage.
Advanced Tips for a Perfect Finish
You can elevate your woodworking skills with a few advanced techniques. These tips help you manage difficult materials and achieve a flawless, professional look on every project. Mastering these methods will give you greater control and confidence.
Stagger Your Nail Pattern
You should avoid driving fasteners in a straight line along the same wood grain. This concentrates pressure and creates a weak point, making a split almost certain. A better approach is to stagger your nail pattern. This distributes the force across multiple grain lines.
For longer boards, you can try a diagonal nailing pattern. This method offsets each fastener, which helps prevent the buildup of splitting pressure along a single line.
Place nails in a slight zig-zag or diagonal formation.
This technique is especially useful for built-up beams or long trim pieces.
Staggering ensures the material's integrity remains strong.
Control Your Hammer Strikes
Your hammer technique is crucial for a clean finish. A controlled swing prevents bent nails and reduces the impact force that causes splits. You can improve your accuracy and power by adjusting your grip.
For the first tap: Hold the hammer near the middle of the handle. This gives you more precision to set the nail correctly.
For driving: Shift your grip to the end of the handle. This creates more leverage, allowing you to drive the fastener with powerful, efficient strikes.
Always stand with your feet shoulder-width apart for a stable base. This stance allows you to swing freely and accurately, protecting both you and your project.
Nailing Hardwoods and Thin Boards
Dense hardwoods and delicate thin boards require special care. Forcing a fastener into these materials is a common cause of damage. You must adapt your technique for the specific material you are using.
When working with dense hardwoods like oak or maple, you should always pre-drill a pilot hole. This simple step removes wood fibers and creates a path for the fastener, relieving the stress that causes cracking. For thin or brittle materials, you should choose a smaller fastener.
Pro Tip: Brad nails are an excellent choice for thin boards and trim. Their small diameter significantly reduces the risk of splitting the wood, and they leave a tiny hole that is easy to fill.
You can prevent wood splitting on your projects. The key is to reduce the wedging force of the nail. This simple change stops the wood from splitting and ruining your work.
Remember, drilling a pilot hole is your most reliable method. It guarantees a clean finish and protects against splitting.
Apply these techniques in your next project. You will achieve the clean, professional results you want. Your woodworking will look better than ever.
FAQ
What is the best way to stop wood splitting?
You can prevent splitting most effectively by drilling a pilot hole. This technique removes wood fibers before you drive the nail. It creates a clear path for the nail, which eliminates the pressure that causes splits. This is your most reliable method.
Can I use any nail for my project?
No, you should choose the right nail for the job. Finishing nails are thin and have small heads, making them ideal for trim. They reduce splitting risk. Common nails are thick and better for construction framing where holding power is more important.
Does the type of wood matter?
Yes, the wood type is very important. Hardwoods and dry, brittle wood are much more likely to split. You must use extra care with these materials. Always consider drilling a pilot hole when working with dense or delicate wood.
Is it okay to nail into a knot?
You should avoid nailing directly into a knot. Knots are extremely hard, dense areas of wood. Driving a nail into one will almost always cause the board to split. It is best to place your nails in the clear wood around the knot.